Record Your Classroom

The classroom learning environment is a safe space for learners. Ethical and legal boundaries exist that should make us very thoughtful and intentional when we choose to record the learning environment, and who we share that recording with. There are a few situations where recording the classroom might be a useful strategy:

  • Reflection on instructional practices for professional growth.
  • Time-shifting a lesson for the benefit of students who are unable to be in the room at the time it was delivered, or would benefit from review.
  • To meet the objectives of specific curriculum (e.g. student presentations in Oral Communication courses).

Device Options when Recording a Lesson

No two classrooms or setups will be exactly the same. Depending upon your building and your teaching assignment, the tools available to your to record will vary. Basically, the two most common options are as follows:

iPads

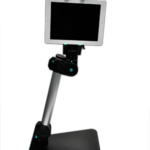
The LPS CLASS Plan does not provision iPads for staff or students in LPS. However, many buildings choose to do so. If you have an LPS iPad that is available to you, this is usually a great option for recording classroom video. If you can pair it with a Just Stand, or a tripod, even better!

The downside of using an iPad is managing the storage space required to make recordings of 20 minutes or more. You may need to lower the video resolution to reduce the recording file size. (Learn more below.) After recording and uploading to MyVRSpot, you will probably want to delete it from the iPad to make room for future recordings.

Laptop + IPEVO Camera

The best camera available to you is often the IPEVO document camera found in most LPS Classrooms. (If you do not have one, reach out to your building Librarian, who may have one available for use.) These cameras can be plugged into any LPS teacher laptop (MacBook Air) or student Chromebook device and should automatically be recognized as an external camera. This means you can use the recording tool of your choice and select the IPEVO as the source of video. The flexibility of camera placement and image quality make it a fantastic option for recording your classroom. As an added benefit, the students have seen it there every day, and will not be as distracted by it.

Considerations

  • Videos are usually better if the camera is recording from the side of the classroom (instead of the front or back).
  • The higher the camera is placed, the better. If you have a file cabinet in your classroom, this is often a great vantage point to record a lesson from.
  • Students can be distracted by new things, and that includes camera setups. Consider setting up the camera a few times before you actually intend to record, just to get them used to having it in the environment. Another good idea is to show them (on the projector) that they are being recorded. Let them have 30 seconds to be goofy, then ask them to put on their learning hats and ignore it the best they can.

Audio

No matter which tool you use to record your classroom, the most important thing to consider is good sound. A beautiful video with poor sound is frustrating and potentially useless. You will want to make sure that you have done your due diligence in assuring quality audio is picked up during recording of your video. A few things might help:

Audio Enhancement
Be sure to use the Audio Enhancement microphones in the classroom both when YOU are speaking, and when the STUDENTS are speaking. You should not need to turn up the volume on the built-in classroom speakers. Just be thoughtful when placing the camera in your classroom. Set it underneath one of the speakers and the camera should pick up the sound just fine. 

Bluetooth Microphones

Small and inexpensive bluetooth lapel microphones can be purchased independently and paired with a laptop or iPad to dramatically improve audio recording. The only downside is the extra hassle of setting it up and using it when recording.

Never record with a personal device.

As convenient as it may feel, recording the classroom environment on a personal (non-LPS) device is never acceptable for many technical, legal, and ethical reasons.

  • Federal regulations demand that evidence of learning and assessment be stored in a FERPA compliant digital tool. Most would say that a recording of your classroom qualifies. Commercially available tools (like Apple iCloud, or personal Google Drive accounts) are almost never FERPA complaint.
  • Parents are (rightfully) uneasy about recordings of their student’s learning sitting in your personal cloud storage beside personal content. 
  • LPS Computing Services is unable to support personal devices or software that is not approved in the ITT Matrix.

If you have a professional need to record in your classroom, your building/LPS should provide you with the tools needed to do so in a legal and appropriate way. LPS has a number of options for recording, storing and sharing FERPA protected content in compliance with Federal regulations.

Crossed out image of a person recording video on a cell phone, indicating that this is not allowed.

Video Recording Tools

MyVRSpot’s Built-In Video Recorder

You can use the built-in recording tool found in MyVRSpot to record your video and have it saved directly into your account all in one step. This is the most efficient process, but know that it works better for shorter recordings (20 minutes or less).

  1. Log into the LPS Portal in a web browser such as Google Chrome (on laptop) or Safari (iPad). Click on MyVRSpot in the Portal to be logged in.
  2. From the Media Tools menu at the top of MyVRSpot, choose Video Recorder.
  3. If prompted by the web browser, click in the pop-up window to ALLOW the browser to access your camera and microphone.
  4. Make any camera and microphone selections needed at the bottom of (in case you are using an IPEVO, or an external mic, for example.)
  5. Click the green Enable Camera button to turn on camera recording.
  6. When you are ready to start recording, click the button(s) to begin recording immediately or after a short countdown.

The first 5 steps above may be completed before class starts, leaving you to simply begin the recording when needed during class.

LEARN MORE: How to use the MyVRSpot Video Recorder.

Practice Makes Perfect!
It is a good idea to try a recording “practice run” before you need to record a big event. It will help you run into any technical hurdles and figure out how to get around them before the important lesson or event you intend to record.

Teacher Laptop: Local Recording Options

The MacBook Air provided to certificated staff in LPS has a few good options for recording videos directly to the laptop itself. After recording, you can then upload the video to your MyVRSpot account.

  • QuickTime: The default QuickTime player you use to watch videos on your laptop can also RECORD videos! It is very simple, and probably you best option for local recording. Learn more about it here.
  • Zoom: Many people are used to using Zoom to record meetings because it works well for this purpose. It can also be used for recording your classroom. Just select the external camera you are using (IPEVO or iPad).
  • IPEVO Visualizer: The same tool you use when displaying the IPEVO document camera to your students can be used to record classroom videos. Just adjust the camera to point OUT instead of DOWN. For tips on using the recorder, view this short YouTube tutorial video.

iPad: Camera App

If you are using the Camera app on an iPad, you can save the video first, then upload it to MyVRSpot afterwards. This is probably more reliable than recording within another tool. Learn more about recording videos in the Camera app.

If you are recording on an iPad, available storage space will always be a concern. You can start by deleting previous recordings to free up space. Another great idea is to reduce the image quality in the camera app so that your video takes up far less space.

  1. Open the Settings app on the iPad
  2. Tap to view the Camera settings (in the left menu)
  3. Choose a lower resolution, such as 720×480.

Sharing the Video

Regardless of the tool used to record the video, you will want it to end up in MyVRSpot. This is the best option for storage, for playback, and for sharing and it can be found in the LPS Portal. Learn more about MyVRSpot.

Remember – this is a special video.

It is pretty easy to share videos in MyVRSpot, but remember that this is not just any other video. This is a recording of your classroom learning environment, which is protected by Federal regulations. Be very careful how, and with whom this video is shared.

Common ways to share video in MyVRSpot

The best way to share video in MyVRSpot depends upon your audience and purpose. Here are a few common examples. If your example is not covered here, please enter a Help Ticket and a member of the Computing Services Educational Technology Analyst team will be in touch to figure out a strategy with you.

Groups

Imagine a scenario where you want to share video with a Principal or Instructional Coach as privately as possible. MyVRSpot allows you to create a group with as few as two people in it. You can share videos to the group, which allows group members to view them, but no one else. This is the most secure way to share a video with another person in LPS. Learn more about creating and sharing in MyVRSpot Groups.

Links

Every MyVRSpot video has two link types that can be shared. Be very careful, as one of these should not be used in this situation.

Share INSIDE MyVRSpot: You can use an “INSIDE” link to share your classroom recording with other LPS Staff, but be careful about it. You will first want to set the Media Permissions to “Teacher and Above” to prevent students from viewing the video. You should also know that any staff member in LPS at the same grade band (Elementary, Middle, High) would be able to use the search function to locate this video and watch it, even if you do not send them the URL/Link. If you are OK with the possibility of this, send the INSIDE link to the person you want to watch the video. After they have watched it, you can change the media permission back to “Private” so that no other teachers can search and find it.

Share OUTSIDE MyVRSpot: You should never share a video of your classroom learning environment with an OUTSIDE link. This would allow the video to be viewed by anyone with the link, anywhere in the world, without logging in. The link URL could be forwarded from person to person and will continue to work. This could be a violation of FERPA and LPS Board of Education Policies.