Record Yourself
 MyVideoSpot is not just a tool to house videos, but also one to create videos. Through the Recorder feature, users can record themselves delivering instructional material, save their videos, and have students access the videos—all within MyVideoSpot. They may also chose to share videos directly to their Google Classroom. To learn how to create a recording of yourself in MyVideoSpot, see the instructions below and watch the tutorial video.
Log in to MyVideoSpot from the LPS Portal.
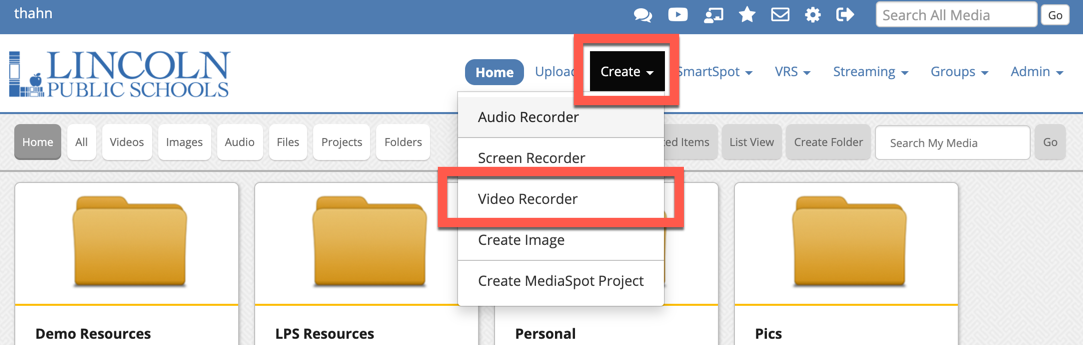
- Click Create from the menu toward the top of your home page then select Video Recorder.
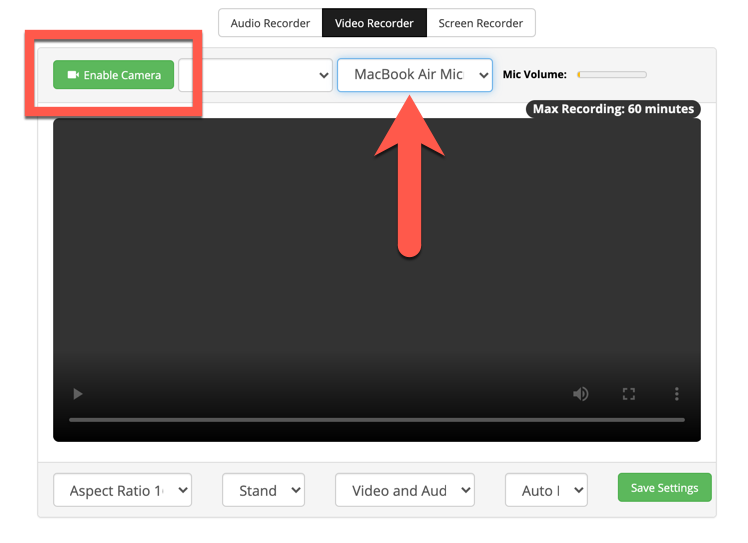
- Make sure you have the correct mic input selected then click the green Enable your Camera button. (You may be prompted to grant Google Chrome permission to access your camera. Click Allow.)
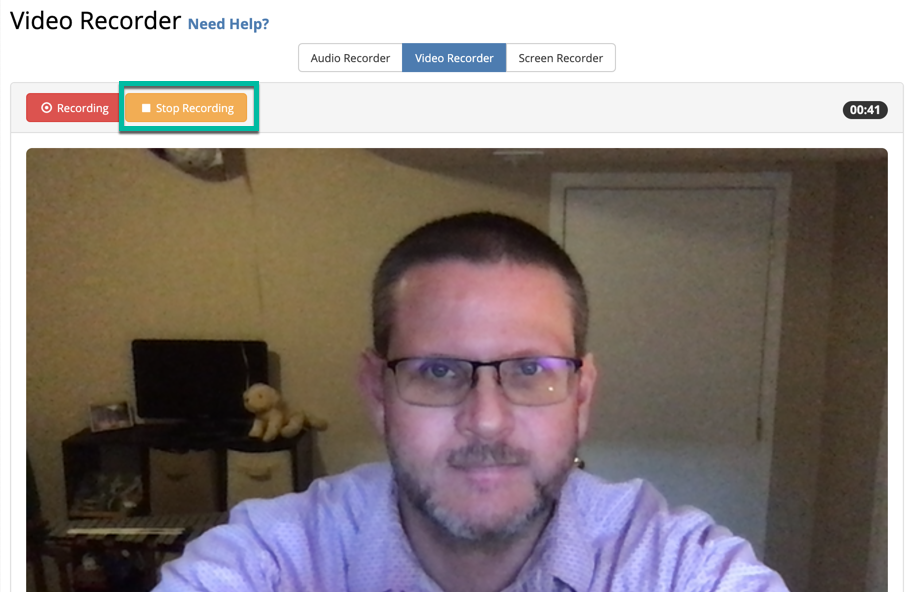
- You will have two options: Start Recording Now (recording starts immediately) or Start Recording in 3 Seconds (will display a countdown from 3 – 2 – 1 – record).
- When you are done recording, press the Stop Recording button.
- Choose Delete Recording, Download Recording, or Save Recording to My Account.
- After recording your video, edit the media settings so that students can access it.
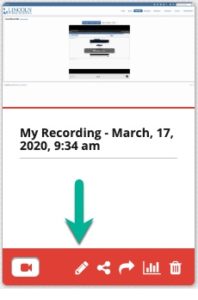
- Click the Home button in the menu at the top of the page, and find your recent recording among the media tiles (by default MyVRSpot names your video “My Recording – [date/time]”).
- Click the Edit Attributes button (pencil icon) within the video tile (as seen in the image to the right).
- Rename your video so that it more appropriately describes the content. You may also choose to add a description.
- Change the setting to Public (the default is set to Private).
- Click Update.
Updated July 10, 2025
