Adobe Acrobat Pro DC: Printing PDF Files
Adobe Acrobat Pro DC was formerly named ‘Adobe Reader’, ‘Adobe Acrobat’ or ‘Acrobat Reader’
The default PDF viewer on LPS computers is called Adobe Acrobat Pro DC. Printing pdf files using the current version of Adobe Acrobat Pro DC may be different than it was with older versions.
Here are a few steps that will help you be successful and avoid failed printing attempts due to invalid accounting codes.
1. Print Button
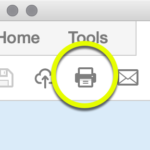
Open your PDF file in Adobe Acrobat Pro DC and either:
- Click the small printer icon in the Reader toolbar (as shown below)
OR
- Select Print from the File menu

2. Printer…
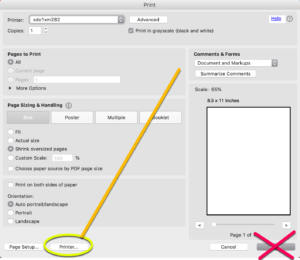
When the print dialogue box appears, click the Printer… button in the bottom left-hand of the window.
DO NOT click the Print button.

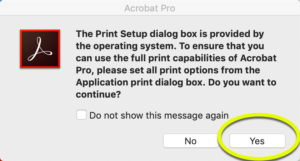
Pop-Up: You may encounter this pop-up window. If so, dismiss it by clicking Yes

3. Select Printer & Options
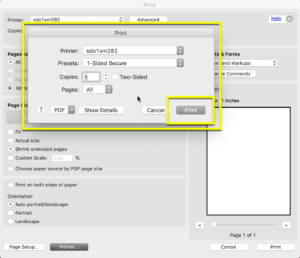
- Select the appropriate Printer.
- Adjust printer options if necessary (number of copies, pages etc).
- Click the blue Print button.
4. Print
Click the blue Print button again in the original Print window.


You must be logged in to post a comment.