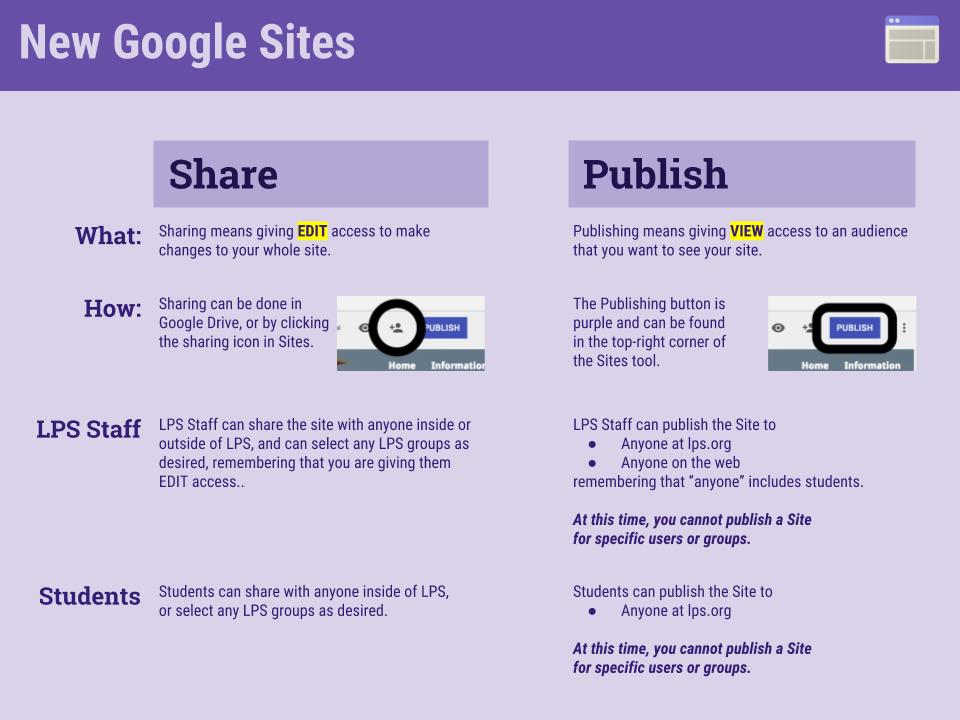
Sharing means “EDITING.”
Sharing within a Google for Education tool such as Google Sites allows those users with granted access the ability to edit the Site. This means they can edit, add, or remove content without the owner’s approval. Any LPS user can share sites with other users. For much more info and clarity around sharing and publishing, click on the image to the right.
To share, click on the sharing button and add users or groups. This is the same behavior used when sharing a Google Doc, Sheet, Slide, etc.
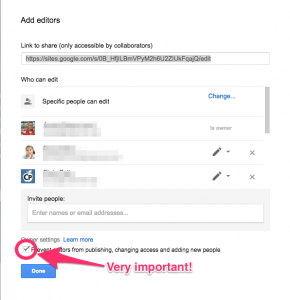
Prevent editors from publishing, changing access and adding new people.
An important option to consider while sharing is the checkbox which states, “Prevent editors from publishing, changing access and adding new people.”
Publishing means “VIEWING.”
Publishing within the New Sites provides some new options for teachers. LPS staff members now have the ability to publish sites inside LPS or to the outside world. This is an important distinction, since in the Classic version, publishing outside of LPS was not a possibility for any user.
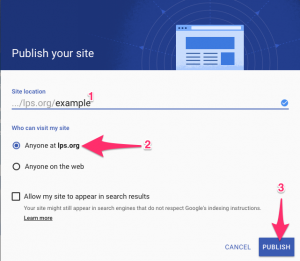
To publish, click on the “Publish” button. Then:
- Name your site, which creates a unique URL
- Choose to either publish the site to “Anyone at lps.org” or “Anyone on the web” OR click the MANAGE link text to select specific LPS people or groups who can view it.
- Select “Publish”


You must be logged in to post a comment.