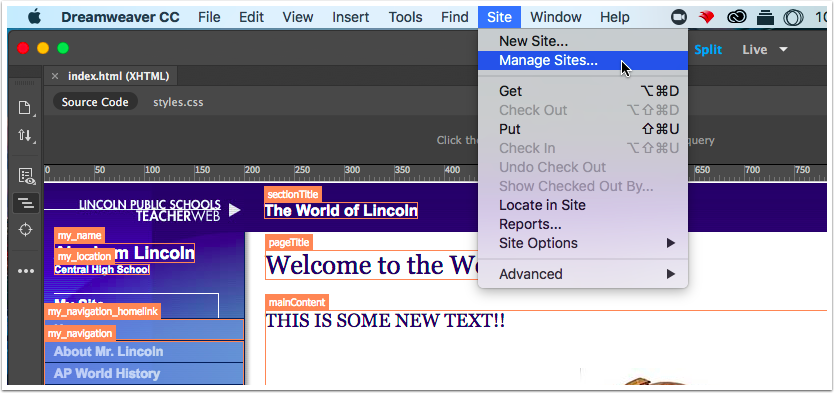
Switching Dreamweaver from a FTP to a SMB Remote Connection

During the 2017ā€“2018 school year, FTP was disabled to block a possible security weakness in our network and prevent it from being exploited. While FTP has been turned off, it is still possible to use Dreamweaver with the iSite server by utilizing the SMB protocol.

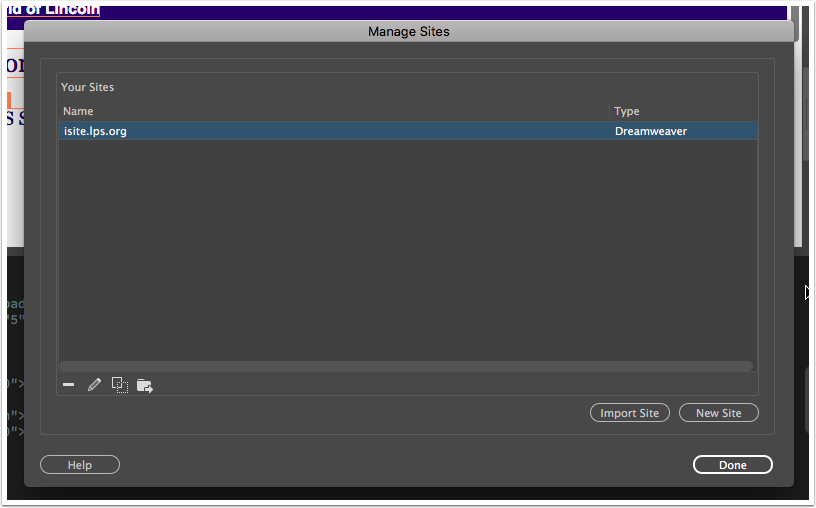
Please note that Dreamweaver is very customizeable and your windows may not appear EXACTLY as they are displayed below. You could need to adapt the instructions to your arrangement. Of course you can always request help via https://help.lps.org if you require it.

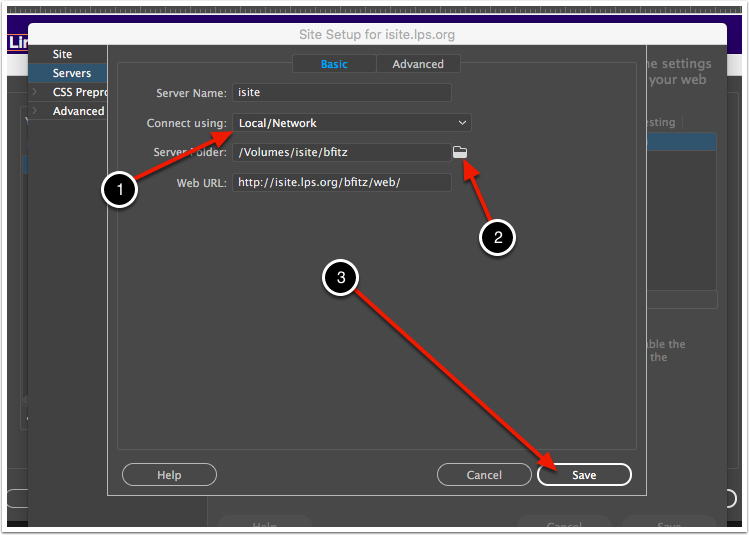
Also note that SMB access is ONLY available while ON the LPS network (connected via ethernet in an LPS building or connected wirelessly to LpsPrivate). You will not be able to connect to iSite for editing purposes while disconnected from the local network.

Mount iSite as an SMB volume

While FTP was really handy in that Dreamweaver handled it natively and you could just connect and transfer all within the application, SMB requires that you connect to it manually in the finder. You can find steps at https://lps.org/go/isite but the basics of it are this…

On Mac

  1. Go to the finder
  2. Press command-K or select "connect to server" from the "go" menu
  3. Enter "smb://isite.lps.org/isite" (you can hit the plus button to add this to your favorite connections)
  4. Enter your LPS login and password and continue
  5. You’ll now have iSite mounted on your computer. If you open it, you’ll see a folder with your name on it which will contain your site

On Windows

  1. In any File Explorer address bar, enter "\\isite.lps.org\isite" (don’t include the quotes)
  2. Enter "lps-admin\[lps username]" as your username (example: lps-admin\jdoe)
  3. Enter your LPS password as your password
  4. Your iSite directory will now be available as a Network folder. If you open it, you’ll see a folder with your name on it which will contain your site

You’ll need to do this each time to want to work on your site, but if you save the connection then it’s a relatively quick thing to do after you’ve done it the first time.

Manage Sites

It’s perhaps been a LONNNNG time since you used the "Manage Sites" dialog in Dreamweaver, so we’ll work through that. The Dreamweaver stuff looks pretty much the same on Mac and Windows, so there will just be one set of instructions here.

In Dreamweaver, select the "Site" menu, then "Manage Sites…" within it

Select Your Site

Double Click on the site you want to edit.

You likely only have one site to pick from, but if you have multiple be sure that you are editing your iSite website.

Choose your remote connection

  1. Select "Servers" in the left column, then
  2. Double click on the FTP remote connection to edit it

Change connection from FTP to Local/Network

  1. Change "FTP" to "Local/Network"
  2. Click on the folder icon to go find your site folder. Use the navigator that comes up to find the server you mounted and then the folder with your site in it.
  3. Click "Save". You can hit "Save" and "Done" in the other windows as well. Your connection is now edited.

Test Your Connection

In Dreamweaver’s file browser, select "Remote" and your flies from iSite should pop right up. You can now upload, download and synchronize just as you were able to with FTP.

Remember

When you require the use of Dreamweaver to edit iSite going forward, you’ll want to ensure that you have the iSite volume loaded first. Dreamweaver will then have no problems finding your content.